ready-to-build configurations
All the parts you need are included in these configurations.
Individual parts
Simply assemble your desired configuration yourself. The combination possibilities are almost limitless. Your only limit is the rack width.
All the parts you need are included in these configurations.
Simply assemble your desired configuration yourself. The combination possibilities are almost limitless. Your only limit is the rack width.
At drei-d-w, there are a variety of predefined configurations that can be ordered as ready-to-build units. Nevertheless, many other different combinations of rackmount configurations are conceivable, but not all of them can be offered as ready-to-build configurations.
On this page you will learn how to create your own configuration. Thus, the possibilities are limitless.
For which rackmount width should the desired configuration be created
Step 1: Decide if you need a rackmount configuration for 10" or 19".
Based on your decision, the following measurement is the starting point
Which parts should be included in your desired configuration?
Step 2: Choose which base plates, connectors, and side panels to include in your rackmount configuration.
Important in this step is the following: Each base plate and connector (with one exception) has a certain width. The sum of the base plates, fasteners and side panels must add up to either 237.20 mm (for 10″) or 465.00 mm (for 19″) at the end. Two examples are given below.
Base plates: -1U Base plates-
Connecting elements: -1U Connecting elements-
Side panels: -1U Side panels-
The following configuration is used for an example calculation:
| Description | Invoice | Available remaining width |
|---|---|---|
| 10″ rackmount | 273.20mm | |
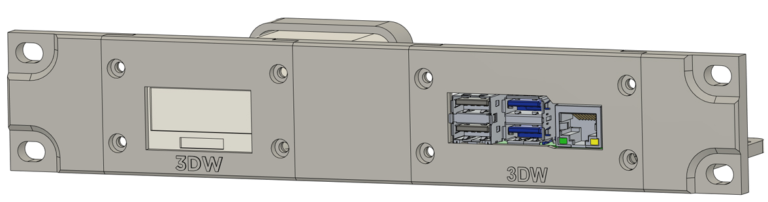
| RasperryPi base plate (80.00mm width) | 237,20 – 80,00mm | 157,20mm |
| Cloud Key Gen2 Base Plate (66.00mm width) | 157.20 – 66.00mm | 91.20mm |
| 3DW-Z1 Fastener (40.00mm width) | 91,20 – 40,00mm | 51,20mm |
The remaining width of 51.20mm is now divided between two side panels. 51.20mm / 2 = 25.60mm. It follows that a pair of side panels in the SM1U-25.60 configuration is required.
The following configuration is used for an example calculation:
| Description | Invoice | Available remaining width |
|---|---|---|
| 19″ rackmount | 465.00mm | |
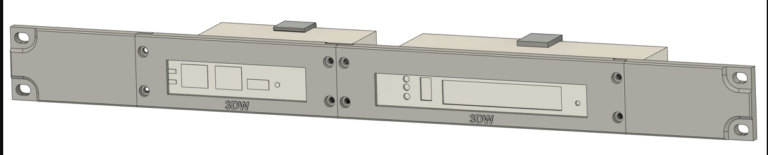
| tp-link ER605 base plate (186.40mm width) | 465.00 – 278.60mm | 278.60mm |
| tp-link OC200 (130.00mm width) | 278,60 – 130,00mm | 148,60mm |
| 3DW-Z2 Fastener (00.00mm width) | 148,60 – 00,00mm | 148,60mm |
The remaining width of 148.60mm is now divided between two side panels. 148.60mm / 2 = 74.30mm. It follows that a pair of side panels in the SM1U-74.20 or SM1U-74.40 configuration is required.
(the gradation of the side parts is only available in 0.2mm steps. However, it does not matter at all whether the side parts are 2 tenths too short or long in total).
Just get in touch with me. I will be happy to help you create your desired configuration.
No account yet?
Create an Account
